How does it work?

1. Insert three pads

2. Pour tap water over the pads until the ceramic bowl is full.

3. Hold the timer button for 3 seconds until the light turns off and on again.
4. Assembled in 2 minutes, harvested in 7 days

Was du erwarten kannst —
Tag für Tag.
Erste Sprossen sichtbar.
Der „Es funktioniert!"-Moment. Du siehst: Es wächst.
Erste Ernte. Erste Mahlzeit.
Frische Microgreens, roh geerntet, direkt drübergestreut. Der Wirkstoff bleibt erhalten.
Die Routine sitzt.
Du streust täglich frische Microgreens über dein Essen — ohne nachzudenken. Prävention, die wirklich passiert.
Mikronährstoffe. Täglich. Verlässlich.
Dein Körper bekommt die Wirkstoffe aus der frischesten Quelle, die es gibt.
Eine Routine mit Wirkung.
Über 100 Mahlzeiten mit frischen Microgreens angereichert. Das ist keine Diät. Das ist Prävention.
Echte Kunden. Echte Ergebnisse.
Das berichten Tausende nach 3 Monaten mit ingarden:
——
88%
berichten eine positive Veränderung in ihrem Leben
——
96%
finden ingarden einfach oder narrensicher
——
88%
würden ingarden weiterempfehlen
——
84%
kaufen ingarden primär für ihre Gesundheit
Common mistakes
Pour too little water over the pads.
Pour approximately 1 liter of tap water (not filtered water). Pour water evenly over each pad until the ceramic tray is filled to the brim and the pads are completely saturated . After that, you do n't need to add any more water until harvest in 5-7 days . However, keep an eye on the water level if the air is too dry.
If you don't want to harvest the microgreens after 7 days, add water to the tray from the side . You should harvest and eat the microgreens after 14 days at the latest, or keep them fresh in an airtight container in the refrigerator.

Do not set a timer & synchronize with daily rhythm
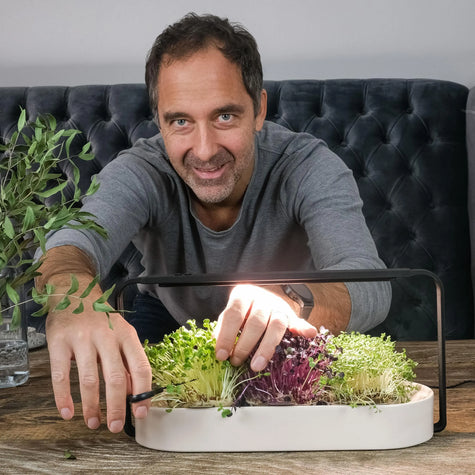
For optimal results, we recommend activating the timer. Simply press the timer button (see image) for 3 seconds until the light briefly switches off and then back on.
Important : Start the light cycle of your indoor garden in the morning so that the microgreens experience a natural day and night cycle.

Do not use the brightness control
Of course, you can adjust the light brightness as needed. Our microgreens are adaptable and can thrive even with occasional reductions in light intensity. However, ensure that the plants receive most of their light cycle at full brightness to guarantee optimal growing conditions.
Do not expose to direct sunlight (e.g., near a window).
Ingarden should only be used indoors and works best in shady locations at room temperature . For best results, do not place your Ingarden in direct sunlight or in areas with high temperatures.
Erntegarantie inklusive
Falls deine erste Ernte nicht klappt — wir kümmern uns. Kein Stress, kein Aufwand.
Erntegarantie ansehen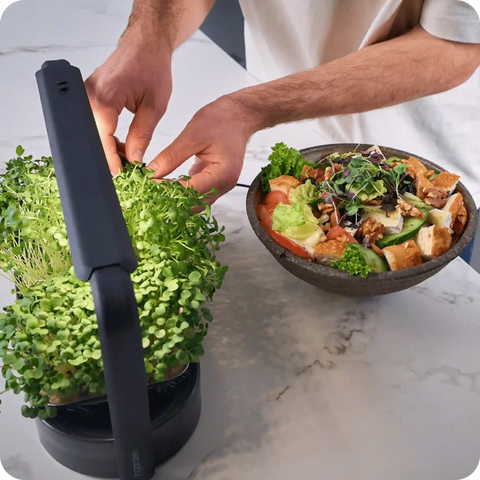
A handful a day. That's enough.
You don't need to restructure your meals. A handful of fresh microgreens daily is enough to get the nutrients your body needs — harvested raw, full effect. (A handful equals approx. ½ seed pad.)
Im Salat
Einfach drüberstreuen — fertig.
Aufs Brot
Perfekt zur Brotzeit oder fürs Frühstück.
Über Pasta
Frisch drüber — nicht mitkochen.
Einfach pur
Direkt aus der Ernte snacken.
Tipp für den Nachmittag: Viele unserer Kunden snacken eine Handvoll Microgreens pur — direkt nach der Ernte. Das hilft, Heißhungerattacken zu vermeiden, ohne Kompromisse beim Geschmack.
How and when to replace the wicks
We recommend replacing the wicks approximately every 3 to 5 harvests and cleaning them manually under running tap water after each harvest.
The most important signs that the wicks need to be replaced are:
- A lot of old roots that are strangling the wicks.
- The seed pads are not getting enough moisture
- The wicks appear drier and more compact (in contrast to their original fluffiness).
Still questions?
Tap water is perfectly fine for your indoor garden, unless it contains high levels of chloramine, which is used to purify it. You can also use distilled or spring water.
Filtered or demineralized water may sound particularly pure, but it contains hardly any minerals – and these are precisely what microgreens need for healthy growth. Without these nutrients, germination can be weak, growth slower, and pH levels unstable. Water from reverse osmosis systems or ion exchangers can also be problematic because it removes important buffering substances or introduces unwanted sodium. Our recommendation: Use fresh tap water – it's usually perfectly suitable and provides exactly what your microgreens need.
The optimal temperature for growing microgreens is generally between 18 and 24 degrees Celsius. Temperatures around 25 degrees can still be acceptable, but it is important to ensure good air circulation to minimize the risk of mold or bacterial growth, which can occur in warmer and more humid environments.
In summer, when temperatures in the house rise above 25 degrees, there are some measures you can take to protect your microgreens:
- Shade and insulation: Do not place the InGarden directly in the sun or next to heat sources, and if necessary, use reflective materials to protect the plants from excessive heat.
- Air circulation: Ensure good ventilation to move air around the plants and regulate the temperature.
- Hydration: Check the moisture level of the microgreens regularly and water them as needed to avoid overheating.
Whether it makes sense to switch on the light only after the seeds have germinated depends on the type of seed. Some seeds need light to germinate, while others can germinate in the dark.
For some microgreen varieties, such as radishes , arugula , or mustard , it's advisable to switch on the light only after germination. These seeds generally require a cool and dark environment to germinate successfully.
Other microgreen varieties such as broccoli , kale , red cabbage , garlic or pak choi need light to germinate and should be illuminated from the beginning.
For optimal growth of the microgreens, your ingarden has a built-in timer that provides your microgreens with light for 12 hours, as this allows for an optimal balance between photosynthesis and rest for your microgreens.
Once your growth cycle is complete after an average of 5-7 days and you've harvested all your microgreens, you can immediately start growing new ones. Simply compost your used pads (or dispose of them in your organic waste bin), place new pads on top, and water them thoroughly until they are saturated.
The number of pads you should grow at one time depends on your personal needs and consumption. We generally recommend starting with three pads simultaneously. After about a week, you can harvest the first pad. Once you've harvested it completely, discard it and insert a new pad while you harvest the second. A pad shouldn't remain in the ingarden for longer than 14 days, as the nutrient concentration will decrease. This ensures you always have fresh microgreens available. After a maximum of four weeks, you should thoroughly clean your ingarden before starting a new growth cycle.
In fact, growth times vary depending on the variety. Radishes and mustard, for example, are often ready to harvest after just 5 days, while broccoli, kale, and red cabbage require a longer growing period of about 8 days. On average, most of our microgreens reach an optimal size within 7 days.
Microgreens can continue to grow for about 3-4 days after their main growth phase has ended, provided you carefully add water from the side to keep them alive in the indoor garden. Alternatively, you can harvest the microgreens and keep them fresh for 2-3 days in an airtight container in the refrigerator. However, for the best quality and freshness, we recommend consuming them ideally within 1-2 days of harvesting.
We recommend cleaning the ingarden after each harvest to ensure the best quality of the microgreens and to protect them from unwanted odors or impurities.
Please consult these instructions for cleaning your ingarden device.
The ceramic bowl, the bowls, the wick holders, the bowl holders and the wicks are dishwasher safe (max. 55 °C).
After each harvest, manually remove the microgreen roots from the wicks under running tap water. Then, twist the wicks before inserting them into the wick holders to extend their lifespan and promote transpiration.
Ideally, let the ingarden grow for 7 days. After the 7th day, we recommend harvesting the microgreens within 3-5 days. Once you've harvested, simply refill the ingarden with water and add new ingarden pads.
Ingarden Pads are best stored in a cool, dry, and dark environment. Our refill packs are designed for optimal storage and to be kept out of light. This protects the seeds from excessive light exposure, unwanted moisture, or heat damage, which could negatively affect yield. If you have discarded the packaging, ensure it is stored in a sealed container that is protected from moisture and light.
Download the PDF for the ingarden manual (English & German)